When I started baking sourdough it was many years ago, followed old-school recipes, and most of them from cold weather country, I remembered the first time cultivated the sourdough starter, followed what their way was to wait 12 days, but unfortunately gnats growing on the 7th day.... all sorts of experiences.
The sourdough breads were baked during that time really sour! Haha, Gabriel and I were trained to take these type of sour-sourdough.
In these few years, lot more Asian sourdough bakers sharing their professional knowledge of baking sourdough now day, many Youtube videos were shared, many methods were used, and even Hong Kong Actress Momo shared sourdough tutorial videos in Momoment channel, she is a certified baker and chef that was trained in France. Many knowledges and techniques that she shared were precious to us, if you could understand Cantonese, this is a good channel to follow.
Baking sourdough is like what Momo said: "条条大道通Sourdough, ALL ROADS LEAD TO SOURDOUGH", and it is true, you may come to many methods, this baker shared this, and that baker shared otherwise, if a baker shared you must do this and that, then.... don't believe it, because it is not true.
I would said, just adapt a method that you feel comfortable and easier to suit your living lifestyle.
A friend of mine Joe, fell in love of baking during Covid-19 MCO, and she shared one video that is by
I followed the way but using Thermomix to knead everything in 1.30 minutes, and it works!!!
The recipe makes neat dough compares to high hydration dough.
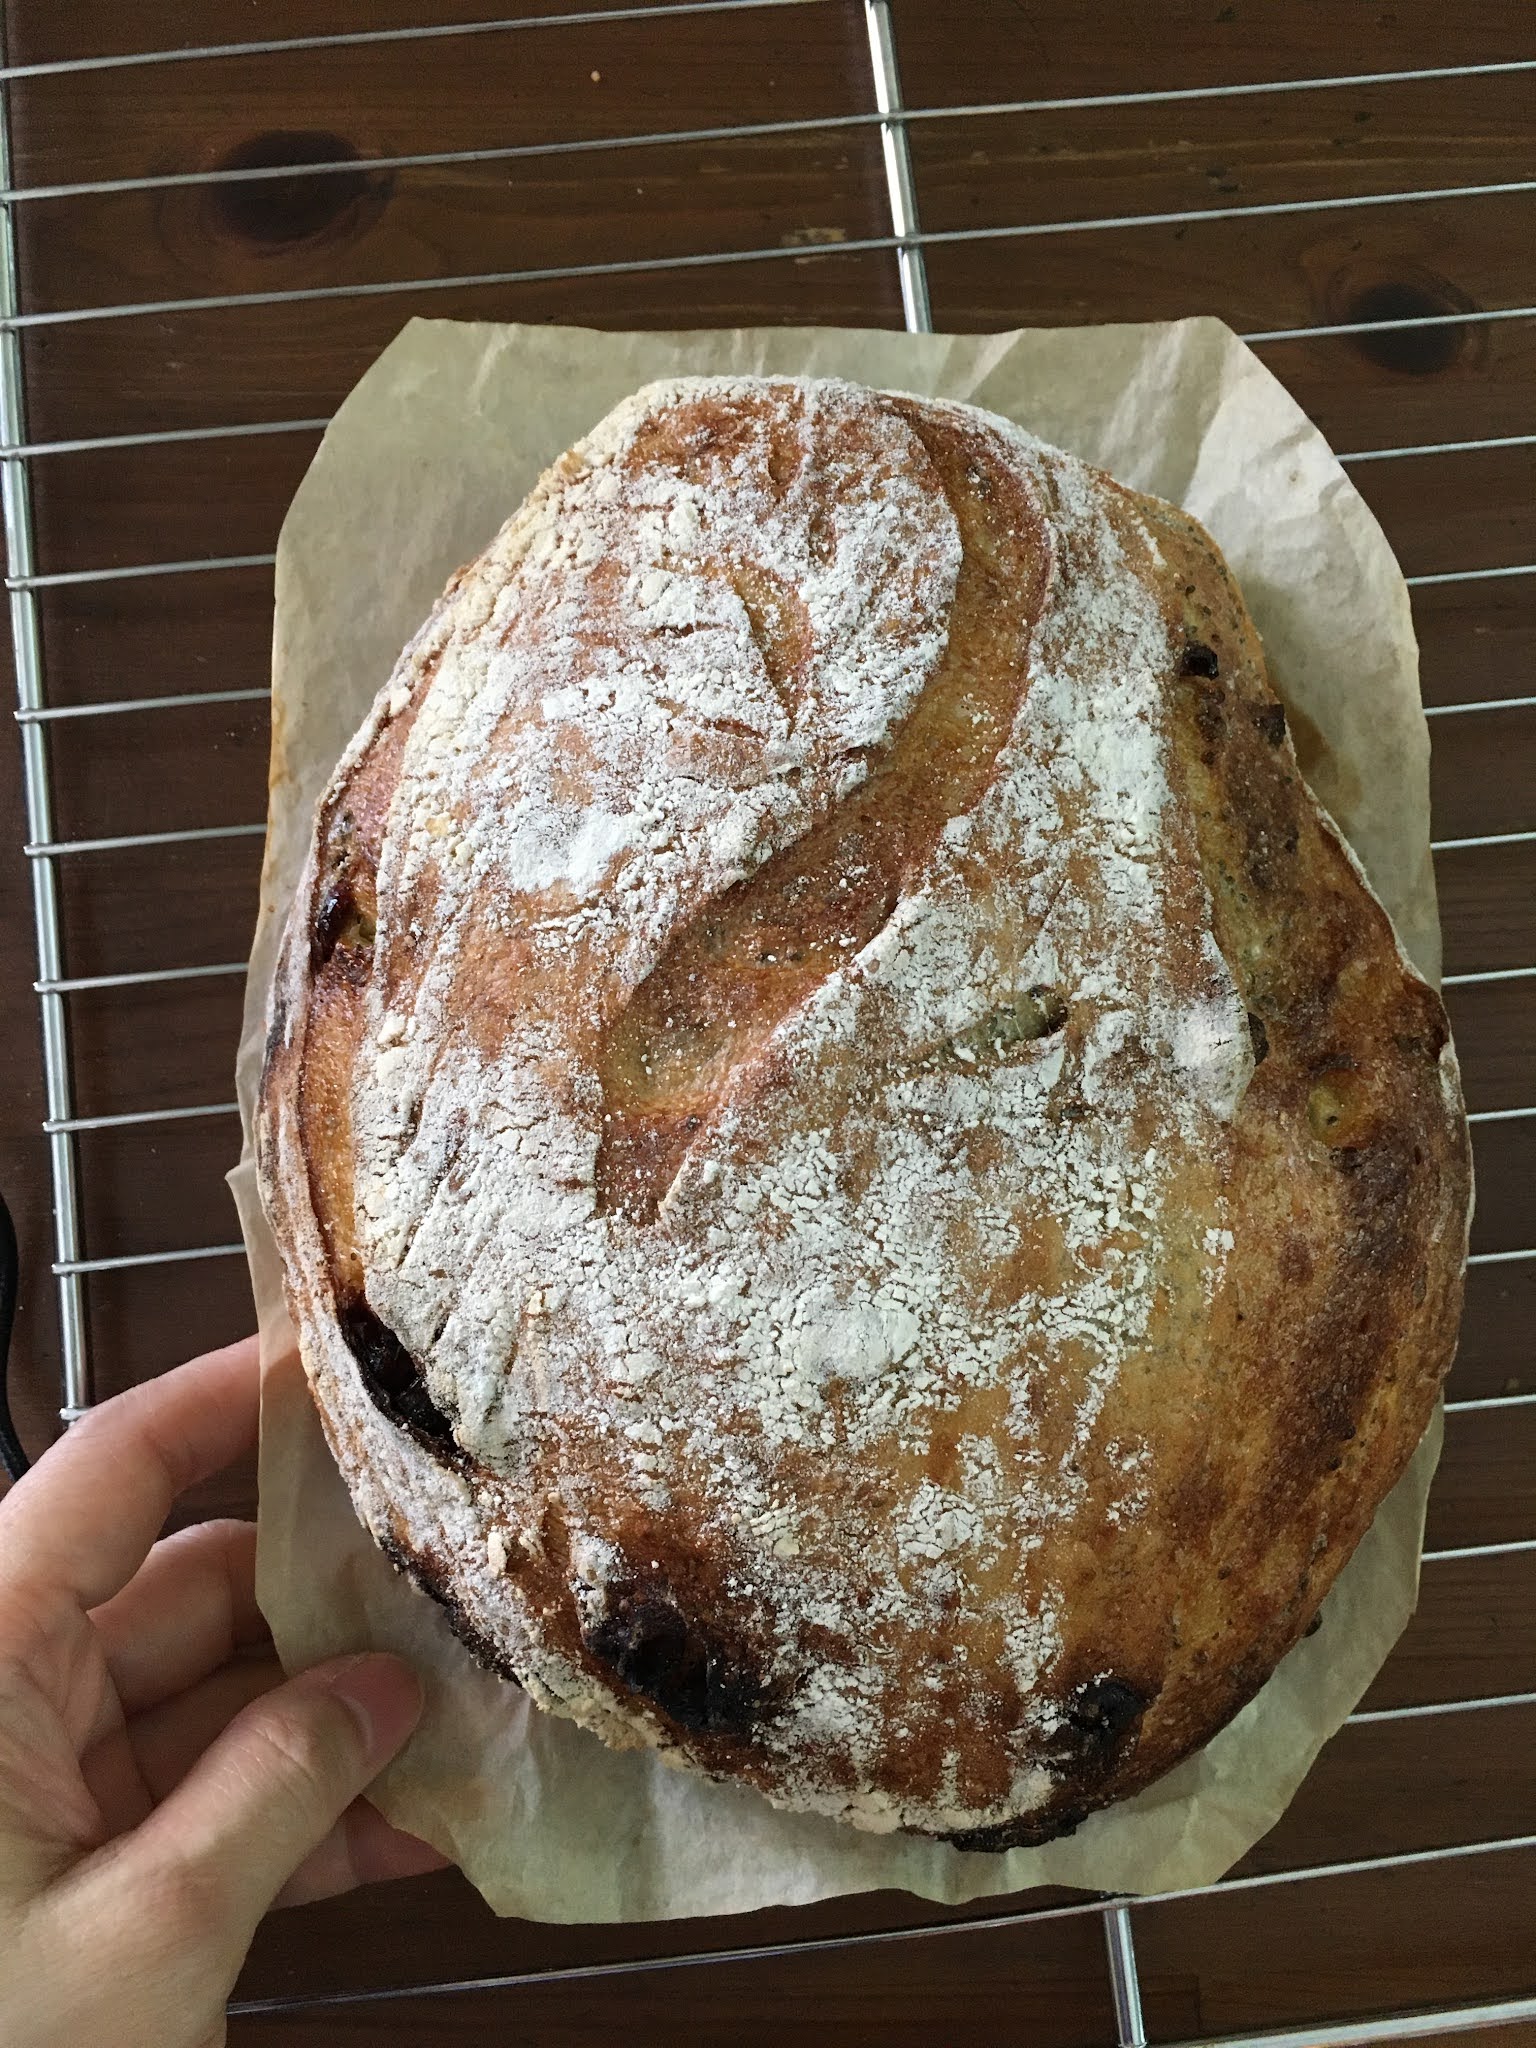
All you need to do, is shaping and wait. Here you go, it oven spring properly! (Even though no ear, I don't really care about it, as long as I could bake two or four loaves in one go without me investing on other useless and expensive tools.)
They still look sexy!
Sun bed-ing...
Here is the recipe:
No-Knead Sourdough Recipe
Ingredients
128g Active starter (100% hydration)
247g Water
375g Flour (I am using Super Melanger Japanese bread flour for all sourdough recipes)
12g Sea salt (You may reduced to 6g-8g)
Banneton Proofing Basket size: 25cm x 15cm x 8cm
Thermomix user, just put all ingredients in TM bowl, knead 1.30 minutes.
Feeding starter:( to divide 128g in three part, each part would be 42.6, therefore 42.6g starter: 42.6g water: 42.6g flour)
Usually I just round up to 45g:45g:45g, you know.... those stick onto the glass or spoon, just spare them.
1) Assume you are already a baker, just fold and roll the dough on a flour free working top, make into a tight ball, store in a container for 4 hours.
2) Open the container, first dust some flour on the surface of the dough, and some on the working table top, turn the container over to slip off the dough, just pull the corner of the dough and fold into a square dough, then using the sticky working top (by this time the working top should be flourless.) push and pull to seal the bottom at the same time to pull the surface of the dough tight, make into oblong shape, keep in banneton basket, wrap with plastic bag, keep in fridge for cold retard.
Bake in the next morning, I am using SSODD SA60L-1A oven, my setting for two loaves is:
1) 260°C 3 minutes, spraying 5 seconds in every 30 seconds.
2) 230°C 12 minutes, spraying 5 seconds in every 30 seconds for the first 3 minutes. Total up 6 minutes of spraying.
3) 50°C 10 minutes, just using the heat already in the oven to dry out moist in the bread.
4) 170°C 8 minutes, crust the skin
5) 180°C 7 minutes, just make it a little burnt and crispy crust.
I have seen bakers baking sourdough by using Innofood V88 and Unox convection oven, ever since I bought this oven the main objective is to be able to bake sourdough with ear, without having me to spend another thousands on dutch oven and pizza stone or other gadgets...
And so I tried and tried, although the sourdough I have baked mostly tasted awesome and great, some chewy recipes, some sourish recipes, and some soft and thin crust recipes, the texture were great, just not able to have ear as what home bakers are looking for at now, me too... am one of them.
I almost gave up since already been trying almost a month. The spray function in SSODD works only for 5 seconds, anytime more than that it will flood the oven. And talked to Ms Gan about this issue, and she advised not to press more than 5 seconds, I was so upset....
Not when I found out in fact Innofood V88 oven need to manually injecting steam too, every minute, press one time, that inspired me. And so I decided to go for a try, tried once, failed, failed as in the sourdough didn't have ear but well baked. Second trial, failed, I tried to figure it out by examine the way I prepare and the temperature of the setting..... The oven spring not as good as what I expected.
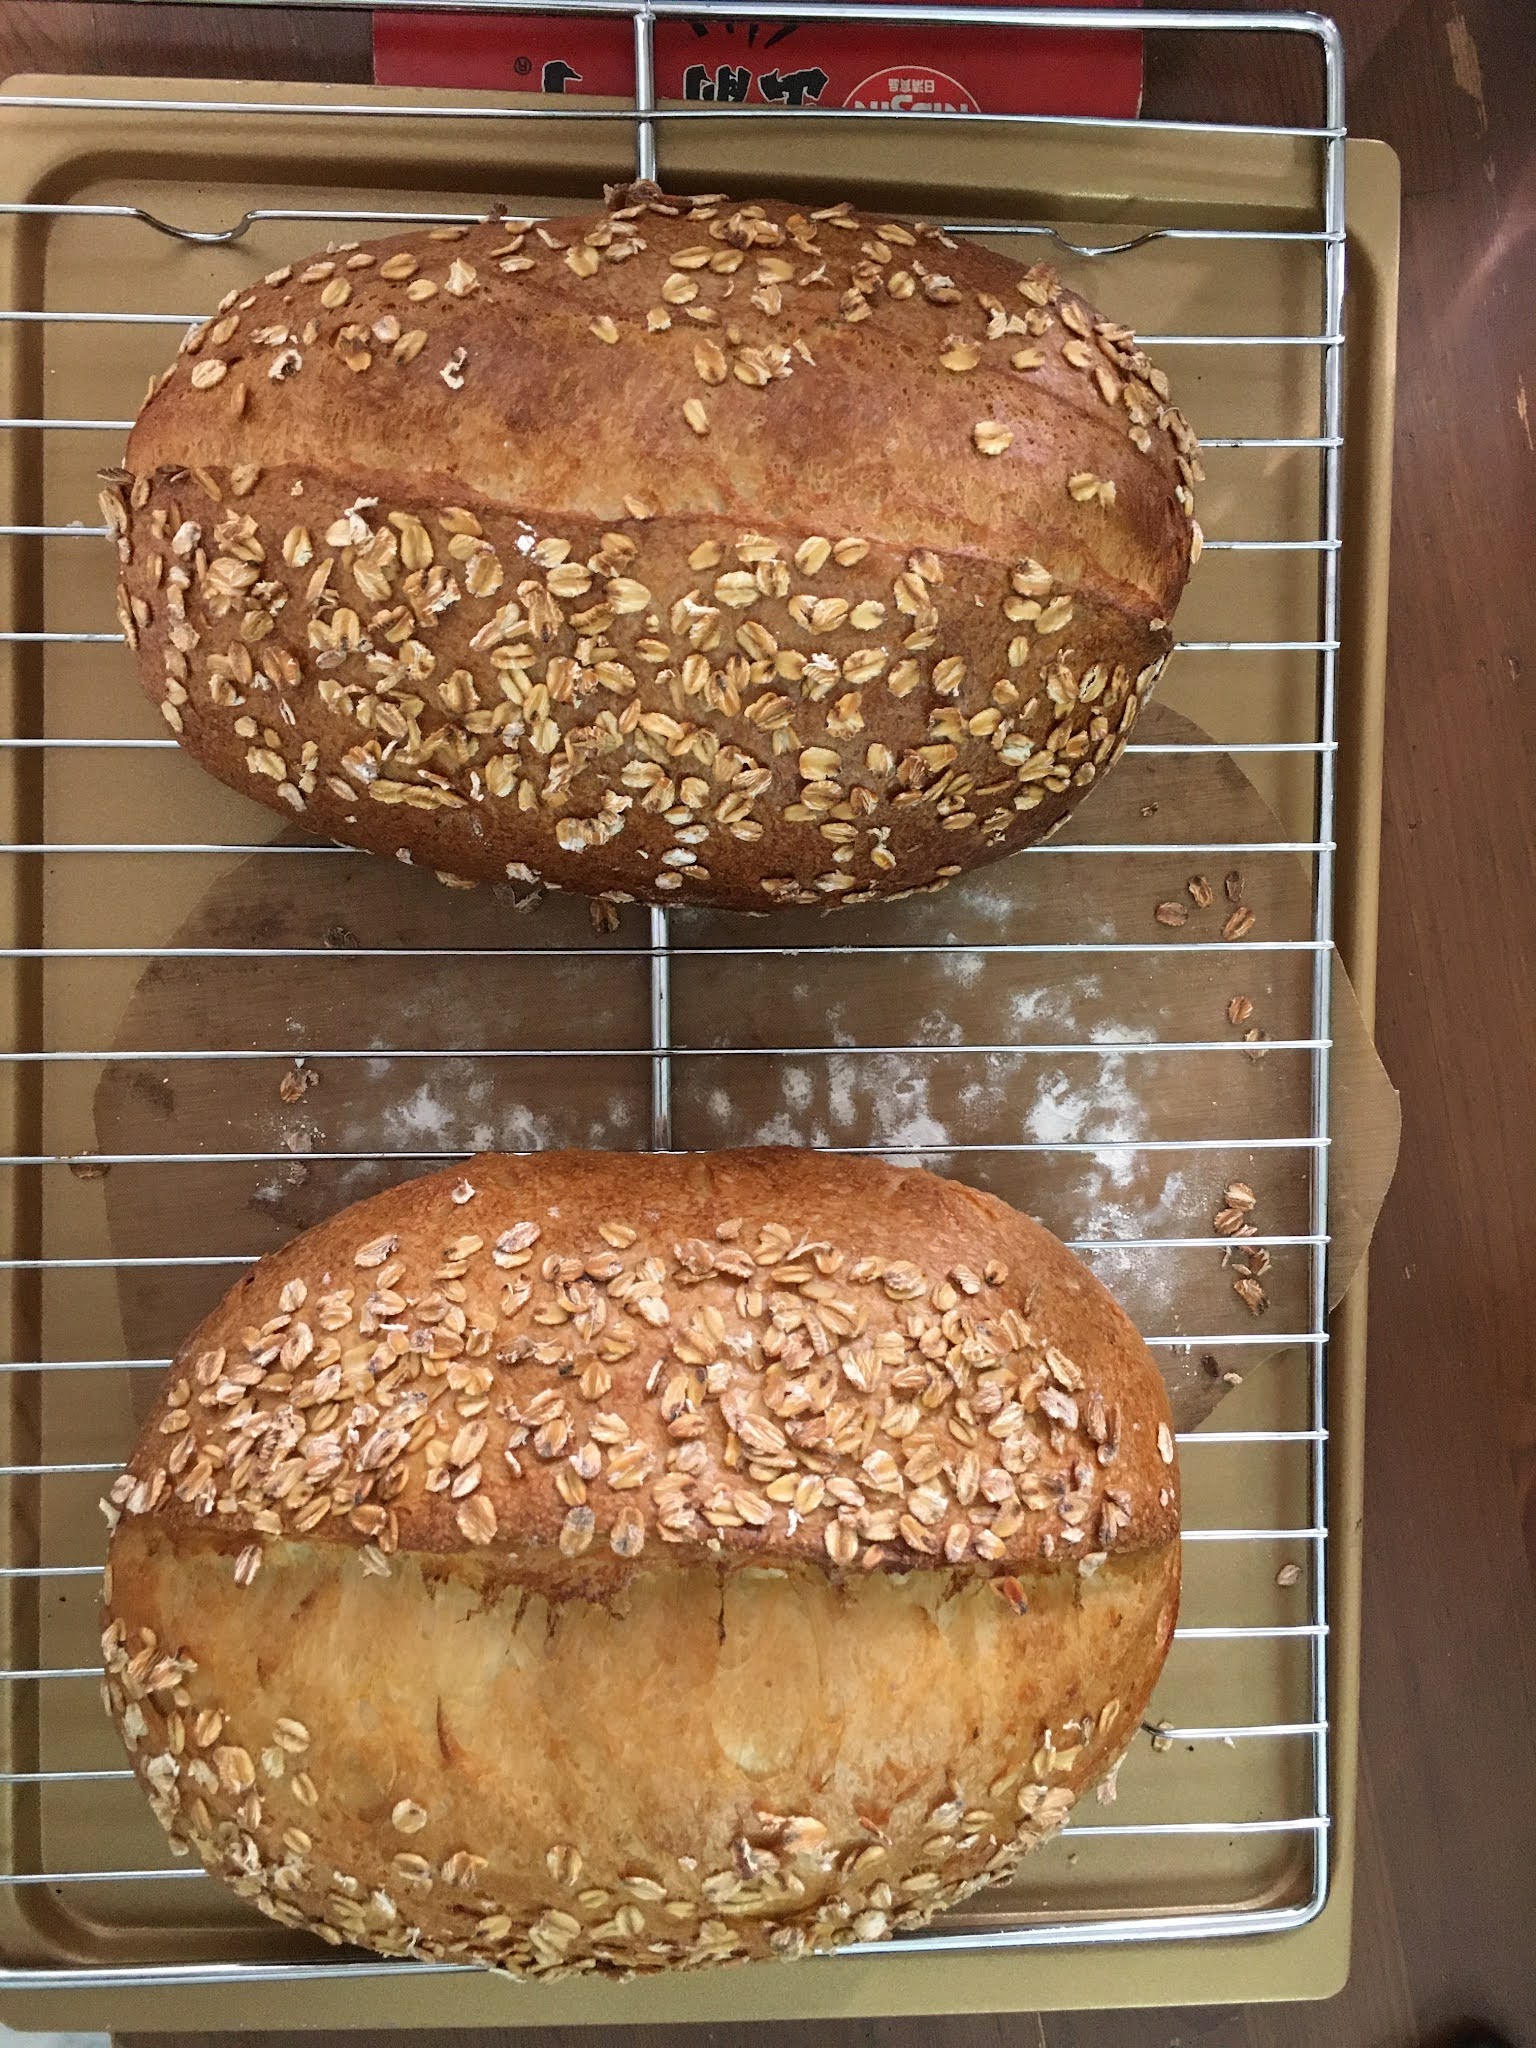
This morning, I tried the recipe Honey Oat Whole Meal Sourdough, the first dough using normal Japanese bread flour, the second dough I am using Super Melanger Japanese flour, and I need to tell you this really make the difference! Super Melanger flour can hold the dough so well, so clean, it does make everything easier for you.
Anyhow this blog is talk about SSODD oven setting for sourdough.
My found is:
1) Preheat with baking sheet placed on a level above middle deck. (Keep it high so that the bread will have to soak in the steam. ( I put add-on bar in between the 2nd and 3rd deck) I think I should try on 2nd deck in next baking.
2) Need to create a lot of steam, hence the initial temperature is 260°C for 1 minute, spray during preheat when temperature oven is ready after preheat, usually took about 10 minutes, don't bake it yet, let it continue preheating, at this moment, you press spray for 5 - 6 seconds, a few time in the interval of 30 seconds, let it be 2 minutes long. Then start baking.
3) After the door open and close, temperature will drop, steam runs away, spray immediately after the door is close, oven temperature still set in 260°C for 1 minute, press 5 -6 seconds in the interval of 30 seconds. After one minute, oven temperature back to 230°C, however, is still good to create steam, although it will a little flood in the base, but I can accept the fact that it will. haha. cheers!
First dough, oven spring well, but the scoring was rather shallow, hence it didn't perform well to create an ear. The oven setting was rather high in fan speed (fan speed 30), that makes the crust form too early.
The second dough, that one using Super Melanger Bread Flour.
With slight changes on the fan speed, awesome! I was overwhelmed by this outcome. The bread was beautifully baked!
Thin crust, soft bread, I prefer not to bake until it is burnt and hard, my habit of taking sourdough, always like to reheat and toast it until crispy, I am totally falling in love with it! The bread can make someone falling in love, my friend Shirley kept on telling me that she doesn't like sourdough bread, not nice, hard and chewy.... and sourish...
I took this bread, and sliced it in front of her, in the mean time she kept telling friends around us, she doesn't like sourdough bread, she has a air fryer, how to use air fryer to toast a sourdough bread, just set 150°C 3 minutes, this will come out just crispy. I saw her took the first byte with butter, her eyes turned big!! And said she can't believe it that the sourdough can taste so good!!
I love sourdough breads, there are many different recipes, some like it sour, like it hard, and like it chewy, some love it soft and less sour. You may choose the type you love!
The left is using Normal Japanese Flour Right: Super Melanger Japanese Flour
Top: Normal Japanese Flour Bottom: Super Melanger Japanese Flour
Here is a simple steps on how to set program on SSODD SA60-1A combat oven.
This feature is very useful to me, as when I bake, I would like to change temperature to achieve best texture bread from it. For example baking cinnamon rolls, I would like to bake it at 155°C for 11 minutes, and 170°C for 4 minutes for a golden colour crunchy crust, yet softer bread inside it.
That is very great feature that you must make good use of it.
The new oven that I invested with, SSODD 60 litre, steam injection and a convection oven, something so new to me, that I am like a newbie in baking.
This oven is awesome, as the temperature and fan speed did help to distribute heat evenly, that I get the best cream cheese buns, cinnamon rolls, baking a few trays at once.., the result is they are super super fluffy!
The best cinnamon rolls I have ever baked.
The only difficulty I have is on sourdough bread. Fist attempt, temperature too high and however they look super sexy though.
And later, with some adjusted, I would prefer softer and thiner crust.
Every baking is an experiment to me, different settings.
SSODD SA60-1A
It has program setting, I am playing with it this week. Will come out an introduction and steps to do it in new post.
10g sourdough starter : 50g water : 50g Bread Flour
Mix Flour and water together knead thoroughly, rest 60 minutes for autolysis.
Mix in sourdough starter and salt, knead about 5 minutes until they are incorporated.
Rest for 1 hour, then 1st folding.
Rest for 1 hour, then 2nd folding.
Rest for 1 hour, then 3rd folding.
Rest for 1 hour, then 4th folding, and shape it, rest in oblong banneton.
Rest for 1 hour.
Preheat oven to 240°C for 30 minutes, letting a tray and steel cover in the oven. Prepare a tray on the lower rack for hot water. Prepare a pot of hot water.
Remove the hot tray from oven, sprinkle rice flour on the surface, transfer sourdough to hot tray
sprinkle rice flour on the surface of sourdough, scorch the bread with a blade.
Place it back to oven, spray a lot of water inside the steal cover, cover sourdough. Pour hot water into the lower tray. Bake for 40 minutes.
I've read some recipes and watched some tutorial videos about methods of cultivating glutinous rice wine, decided to pick up this skill of homemade rice wine, compiled from those I have learnt, lazy people always can find a better and simple ways, simplify most of complicated procedure, here is my way of preparing homemade glutinous rice wine - Makgoelli simple Recipe.
Freshly Harvested
Little to know:
2 types of wine yeast.
You may get wine yeast Lazada or shopee, I got it from Chinese Herbal Shop
I used Thermomix to grind wine yeast,2 sec Turbo X 2 times
400g Filtered water (or boiled water; I am using Kangen pH9.5)
Ingredient C:
1 ltr Filtered water
200g Castor Sugar
Preparations:
1)Needless to pre-soak the rice, rinse 3 times,put ingredient A in electric rice cooker to cook. Do not have to fully cooked, hence only calls for 660g water in this recipe.
2)Loosen cooked rice, and let it cool until temperature drops to 40°C.
3)Put ingredient B without water, grind only the yeast with 2 times x Turbo 2 seconds. Then Add 400g water to stir
2 min / 37°C / speed 3
4)When cooked rice reaches 40°C, pour mixture B into rice and mix evenly. Let it ferment 3 days.
After 3 days.
*I don't really cook rice, I am using rice cooker for fermentation.
5)After 3 days,add in ingredient C, stir and cover, you need to give it a stir every day for 20 days, that is why don't have to worry about the sugar if it is not melting thoroughly. Total fermenting duration is 30 days.
6)Remember to jot down the date!After 30 days, the liquid appears to be clear golden in colour due to precipitated rice.
7)When time comes, using a filter bag to squeeze out milky rice wine, keep in a container. Allow to scope out clearer rice wine the next day. Repeat this procedure next couple of days in order to yearn a clear golden rice wine.
8)I am the type of make-simple-person, I like to drink the rice wine as it is, like Korean Makgoelli, hence I will skip step 7, drink direct as it is.
Rice wine after 30 days of fermentation.
Drink it with dinner.
Harvest three bottles of this, one bottle given to my brother.
The first news from my best friend, she texted me: "finally is your turn!"
Amazing, she helped a few of us to check our appointment everyday and night, so thoughtful of her.
Then I checked a sms from MySejahtera: "Please check the details of the covid-19 vaccination appointment for ID no xxxxx in MySejahtera." The message was sent in early morning 5:34am.
Then I open MySejahtera app to check on the appointment details, I am so overwhelmed by this news. I have been waiting and checking since the day I registered in April.
Looking at friends and relatives who have gotten jab, was feeling sad the day I failed to get AZ, the next day read some of Facebook friends posted that even they have failed to get appointment for AZ on the day, but the next day they got the surprise news from MySejahtera saying the appointment is set for them.
I was devastated day by day after checking on MySejahtera yet nothing appear in the "1st Dose appointment". I check the news from the app every day and night, disappointment that is never fails me...
The feeling is like having constipation.... such long time now has finally released!
To me, in such pandemic time, whichever and whatever vaccine that works, I will take it as earlier as possible, not until everyone in this country is vaccinated, the economic can't get back on track. Therefore if you are not in a health complication, why choose the brand, get yourselves vaccinated as soon as possible. Is for the best of the country and people.